Practical
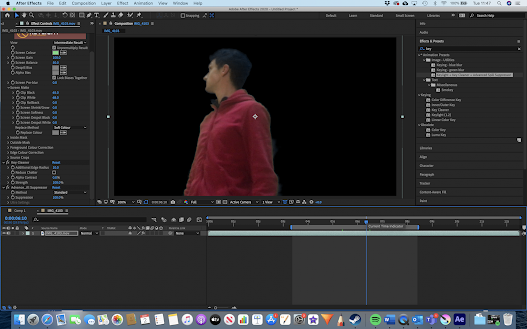
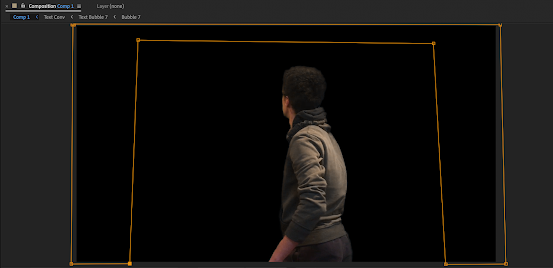
So I implemented the footage into After Effects and then proceeded to follow the procedure on the tutorial which led me to adding and activating the Chromo key which took away the majority of the screen behind the subject, which wasn't that ideal for replacing with a background, as displayed below.
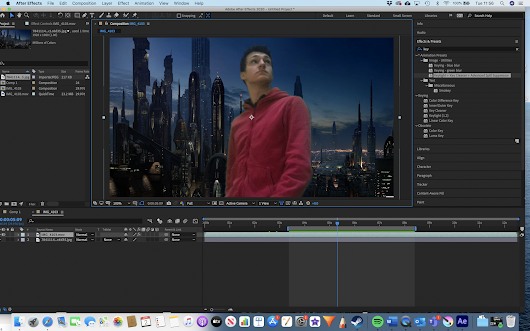
So I continued to follow the tutorial which led to enhancing the blacks and whites in the whole footage, which, when the footage turned back to normal, made the quality of the green screen effect a lot better, but could still be more separate from the subject, as displayed below.
I looked up a simple background on the internet and implemented it into the background on the footage.
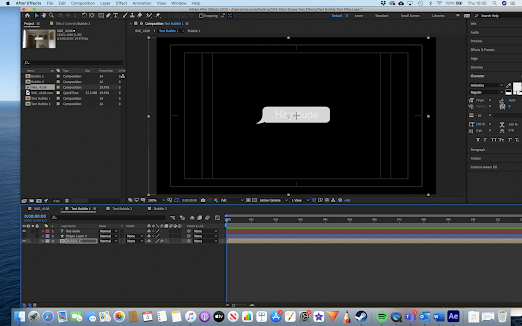
After that, I implemented the two bubbles to the footage, from here I worked on my own accord and played around with the position of the bubbles in the footage, placing them in the at the right time and animating them like how I imagine a text to act on my iPhone, as shown in the final product below.
Recording Footage
After all my research was collected and completed, I began working on the production side of this project, recording footage for the final film scene and editing it with visual effects.
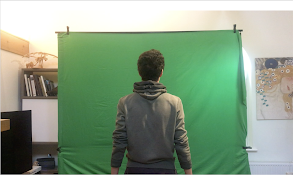
I first started by taking my recording equipment, my tripod and the green screen, and then shot the scenes of the film that I had planned in my research.
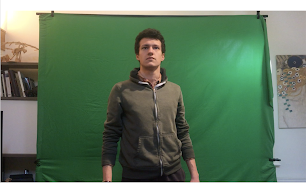
I decided to change my original plan for the green screen scene in my recordings, as there was cloudy weather on the day of recording so the light quality on the green screen itself would have been low and not that practical when editing it in the program. So instead, I decided to film both the scenes after the subject teleports in my house hold, this time with the first scene also having the green screen behind it so I can replace the scene behind that subject to still make it seem like he teleported to a different location, but with it having a less interesting scene than the one in the last scene, as shown below.
I found recording the footage for this project to be quite simple and easy in my opinion, I didn't have many problems during the process, except for the green screen scene but that was cleared just as easily. Looking back now, I noticed some small problems with the quality in some of the recordings, like the lighting on the subject in some scenes.
I then implanted all the bubbles into the original film footage, and then positioned them in the fashion of a text conversation that would happen on an iPhone.
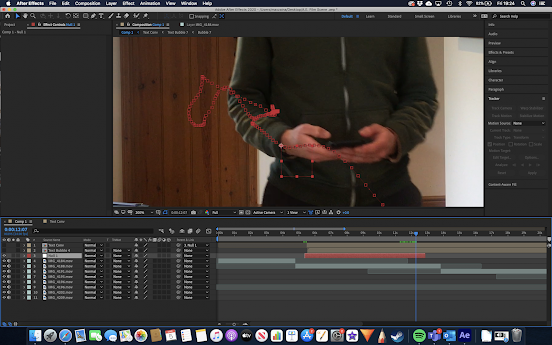
Then, bu following another tutorial on YouTube, YouTube Tutorial, to help me remember how to make this effect I used for a previous project, I created a new Null object in my timeline, and then opened up the motion tracker effect to make tracking box appear on the screen which I then used to track the movement of my hand in the first frames of the footage on my film. I then linked the Null object to the new tracking line.
I then synced the text bubble animation to the Null object and then repositioned the whole text animation so now that when the scene plays out, the whole text animation follows my hand movement, to increase the feel that the text messages are coming from the subjects iPhone which I quite liked the look of.
After the text effect sequence in the film was completed, I went on to making the teleportation effects for the whole film. For this sequence, I referred back to multiple YouTube tutorials I used to make the test effect I also made in my Research blog page to help me in this project, YouTube Tutorial 1, YouTube Tutorial 2, YouTube Tutorial 3, I found some the tutorials less useful than the others. From my last teleportation test effect, I had trouble with physically making the effect and so had to find a solution for this one, as it turned out, I managed to find another YouTube tutorial which gave a link to a special effect which was a kind of puff of smoke, which is what I was looking for, YouTube Tutorial. I then implemented this effect into the film and positioned it in the film where the teleportation effects would take place.
After that, I implemented glow effect to the special effect and an effect to change its colour to give the teleportation effect a cooler and more appeasing look to it when played out in the sequence.
I then added the same glow effect as I did before to the mask layer to add an aura around the subject like I did for my previous test. I added key frames to the effect to make an animation of the glow increase over time before the subject teleports.
I did the same thing for the other footage in the sequence when the subject comes out from the teleportation.
After that was competed, I went onto the internet to search for possible backgrounds for the background in the film. As said in the planning in my Research blog page, I was looking for an unrealistic looking environment, like something out of a fantasy work, to give the viewers the feel that the subject has really teleported to some unknown location that would not be found on earth. I selected these few choices because the style of their landscape was flat too and extent, and would match the sort of land that the subject would seem to be walking on in the scene, and also because of the specific lighting gradient in the images were the closest matching to the subjects.
Satisfied with the result, I exported the image and implemented both the images into the film sequence and placed them in the ground of the in the sequence.
After that was final finished, I decided I wanted to add one more thing to the sequence and that was too make the lighting in the one scene a bit brighter so it was appeasing for the viewer. For, I looked at a quick tutorial on YouTube, YouTube Tutorial, and then went to implementing it into the sequence, which was done by creating a new layer which allowed you to change the certain features in the footage to make it brighter. I admit, there wasn't much of a difference with the applied effect, it only made it slightly more bright, but I still decided to keep it in.
After that was complete, the last thing that needed to be completed was some sound effects in the film, for this, I collected multiple sounds from the internet, I tried looking up a basic teleportation sound effect and an electric sound effect which I imagined would add more to the teleportation effect.
After the sound was finally all implemented, the last thing to do was export the film itself from After Effects, this was the tedious and difficult part of the whole procedure. I've always had trouble exporting films from After Effects, when I tried to export this project, the film turned out without footage, only audio.
The only other thing I could think of doing was taking a screen recording of the footage on the program and then recording the sound from the program separately with my iPhone, and then implemented the footage and audio into a separate I use fro making films, Hitfilm Express, and then export that film in a compatible file which I can see and hear. I then uploaded the film onto my YouTube channel.
As said above, this was the most difficult part in the whole process, trying to record the audio in a quiet environment, and there was even problems with the program as I was trying to record the audio. I wasn't quite happy with the outcome either, by recording the audio separately, it made the audio in the final outcome sound weirder than normal, but I really struggled to find any other way to get this film together.
Final Product
As said above, I didn't quite like the product of the final film, with its slight distortion in the audio, just ruined it slightly for me, but I did like the outcome of the film on the After Effects program. In fact, I liked the whole process of making this film and putting it together. It was a lot easier for me to create the effects, especially the teleportation effect, which I had trouble with before. The only effect I had a bit of trouble with was the green screen effect, in finding the suitable background for it, and of course exporting the film itself, but other than that, I have to say, I quite enjoyed this process. I also like the sound effects I put into it, not just the texting sounds but also the teleportation ones, I didn't think I would be able to find the sounds I did on the internet, like with the backgrounds.
A couple of things I thought could have been better was the lighting in one of the scenes recorded and, of course, my selection of of backgrounds for the final scene. For that, I feel like I could have gotten creative by taking some footage of the near by landscape (like in my original plan) but this time, added a CGI structure in the background, like a city and mountain, to make the scene look more realistic and to have more control of the surroundings for my film.












Comments
Post a Comment